Contents
Part 1 · Understand - 1. What Rib Flare Is · 2. Anatomy: The Canister
Part 2 · The Science - 3. Why Ribs Flare · 4. The Core That Pulls Ribs Down · 5. Breathing & The ZOA · 6. Pelvis, Glutes & The Stack
Part 3 · The Framework - 7. The Rib Flare Correction Pyramid
Part 4 · Do It - 8. Self-Assessment · 9. The Daily Reset Plan · Make It Less Obvious · 10. The 16-Week Program · 11. Where Bracing Fits · 12. Posture Integration
Bonus · Go Further - Troubleshooting & What to Expect
Reference - 13. FAQ · 14. References
How to Use This Program
Here's the good news up front: of all the chest-wall things I help people with, rib flare is the most fixable - because for most people it's a position and control problem, not a fixed bone problem.
I'm Mihail Veleski. I've spent a decade on non-surgical chest-wall work. "Rib flare" is when your lower front ribs - the bottom of the rib cage - stick out and up, especially when you lie down or reach overhead. It can look like the rib cage is "open" at the front.
Most rib flare is functional: the rib cage is tipped into an extended, "open scissor" position because the muscles that should hold it down (your deep front core) are switched off, while the muscles that tip it up (your lower-back extensors) are doing too much - usually paired with shallow chest breathing that never lets the ribs settle. Every one of those is trainable. That's what this program retrains.
You don't "strengthen your ribs." You change their position - by getting the right muscles to hold the rib cage down and stacked over the pelvis, and by breathing in a way that lets it settle. Position is a skill, and skills are trainable. This is mostly a coordination and breathing project with strength on top.
A minority of rib flare is structural - the lower ribs are shaped that way, often alongside pectus excavatum or carinatum.2 Structural flare won't fully "close" with exercise, but the same work still improves how it looks and feels, and a brace can help the structural part (Section 11). I'll always be clear about which is which.
Rib flare doesn't have big randomized trials of its own - so this program is built on solid biomechanics, breathing science, and core/postural evidence, plus clinical consensus.1 Where something is mechanism-based rather than trial-proven, I say so. Citations carry a small lime number1 mapping to Section 15.
What Rib Flare Actually Is
Rib flare is when the lower edge of your rib cage - the costal margin, the bottom front ribs (roughly ribs 7–10) - protrudes outward and upward instead of sitting flat and down. You'll usually notice it most lying on your back, reaching overhead, or in a relaxed standing posture.
Functional vs structural - know which you have
Your ribs are tipped up by posture, breathing and muscle control - not by the shape of the bone. It gets worse when you over-arch or reach overhead, and better the moment you exhale fully and stack your ribs down. This kind is highly correctable with the work in this program.
The lower ribs are simply shaped that way - often alongside pectus excavatum or carinatum.2 It stays fairly constant no matter how you breathe or stand. It still improves with this work, but it won't fully close on exercise alone - a brace can help (see below).
Quick test: lie on your back and exhale fully. If the flare noticeably reduces, you're largely functional - great news. If it barely changes, there's a structural component. Most people are a mix, weighted toward functional.
The pattern behind functional flare
Functional rib flare almost always comes with a recognizable posture: an over-arched lower back, a forward-tilted pelvis (anterior pelvic tilt), and a rib cage tipped back so the front ribs point up and out - the classic "open scissor."
Anatomy: The Canister
The single most useful idea in this whole program: your core works like a canister - a pressurized cylinder. When the lid and base line up, the ribs sit down. When they don't, they flare. Understand the canister and you understand rib flare.
The muscles that pull ribs DOWN (your allies)
- Rectus abdominis & obliques. The front and side abdominal wall attaches to the lower ribs and pulls them down toward the pelvis. Weak or switched-off, the ribs drift up. These are the prime movers against flare.
- Transversus abdominis (deep core). Wraps the trunk like a corset; manages the pressure inside the canister and helps hold the rib cage stacked.
- The diaphragm (used well). A full exhale lets the diaphragm dome up and the ribs settle down - the breathing key in Section 5.
The muscles that tip ribs UP (the over-doers)
- Lumbar (lower-back) extensors. When these dominate, they arch the lower back and tip the rib cage backward - front ribs point up. We calm and rebalance them.
- Lats & tight chest, sometimes. Very tight lats can pull the lower ribs up when you reach overhead. We mobilize as needed.
- Hip flexors (with anterior pelvic tilt). Tight hip flexors tip the pelvis forward, which tips the rib cage back - feeding the flare from below (Section 6).
Rib flare is a tug-of-war: the front core (down) vs the lower back & hip flexors (up). Right now the "up" team is winning. The entire program is just shifting the balance - wake up the front core, calm the over-arch, and breathe so the ribs can settle.
Why Ribs Flare
Three things, working together, tip the rib cage into flare. Fix all three and the ribs settle.
- An extension pattern. The body lives in slight back-bend: lower back over-arched, rib cage tipped back, chest pushed up. This points the front ribs up and out. It's a habit the nervous system has grooved - and habits can be re-grooved.
- A weak / inhibited front core. If the abs aren't holding the rib cage down, nothing opposes the extension pattern. Often the abs aren't truly weak so much as not being used in standing posture.
- Shallow chest breathing. If you never fully exhale, the rib cage stays inflated and propped up all day, and the diaphragm can't reset. Breathing is the piece almost everyone misses (Section 5).
Notice none of these are "your bones are wrong." They're position, muscle activation, and breathing - all things training changes faster than almost anything else in the body. This is why functional rib flare responds so well.
The Core That Pulls Ribs Down
The anterior core is the prime mover against flare. Two jobs: build it, and - more importantly - teach it to stay on in everyday posture.
Strength follows tension
Like any muscle, the abs grow and strengthen through mechanical tension - meaningful resistance through a range, taken near failure.3 But for rib flare, raw strength is only half of it. The bigger win is motor control: training the abs to hold the rib cage down during breathing, movement, and standing - not just during a crunch.
Why "ribs down" beats "crunch harder"
Hammering sit-ups while you keep living in extension won't fix flare. The exercises in this program are chosen because they train the core in the exact job it's failing at: resisting extension and holding the ribs down. Dead bugs, hollow holds, reverse crunches and Pallof presses all teach that, which is why they're the backbone of the plan - not endless crunches.
If you feel your lower back arching or your front ribs popping up during a core exercise, you've left the position that fixes flare. Quality beats quantity every time here - five perfect ribs-down reps beat twenty sloppy ones.
Breathing & The Zone of Apposition
If you only do one thing from this program, do this. Breathing is the lever almost everyone ignores - and it's the fastest way to bring a flared rib cage down.
Your diaphragm is dome-shaped. The area where its edges sit against the inner rib cage is called the zone of apposition (ZOA). When you exhale fully, the dome rises, the lower ribs draw down and in, and the ZOA is restored - the diaphragm and abs can then work together to keep the ribs settled. When you only ever half-exhale and live with an inflated chest, you lose the ZOA: the ribs stay propped up and out. That's flare.
Strengthening the breathing muscles helps too - respiratory-muscle training measurably improves how well those muscles work.4 But the main skill here is simply learning to exhale fully and keep the ribs down as you breathe back in. That's the 90/90 and balloon drills in Section 9.
Lie down, look at your flare, then exhale all the way out - push every bit of air out and let the ribs sink. Watch the flare shrink. That's not a trick; that's your diaphragm re-doming and the ribs coming down. Your job is to make that the default, not a one-off.
Pelvis, Glutes & The Stack
Flare doesn't only come from above - it's fed from below. If your pelvis tips forward (anterior pelvic tilt), the rib cage tips back to compensate, and the front ribs point up. So part of fixing flare is fixing the pelvis.
Unstack from the bottom up
- Glutes help posteriorly tilt the pelvis (tuck it under slightly), which lets the rib cage settle down over it. Weak glutes let the pelvis dump forward.
- Hamstrings assist the same posterior tilt and counter the forward pull on the pelvis.
- Hip flexors, when tight, pull the pelvis into the forward tilt - so we mobilize them.
The goal is the stack: rib cage directly over the pelvis, like two cans lined up. Glute and posterior-tilt work from below, anterior-core and exhale work from above - the rib cage comes down to meet the pelvis in the middle.
Think "ribs down, hips under." Those two cues, held through the day, are most of the fix. The exercises just build the strength and control to make that position easy and automatic instead of something you have to think about.
The Rib Flare Correction Pyramid
My framework for rib flare, in order of what matters most. Unlike a pure muscle-building plan, the foundation here is breathing and position - strength sits on top of that, not the other way around.
Level 1 - Consistency & Daily Reps
Rib flare responds to frequent practice more than to occasional hard sessions. A few minutes of resets every day beats one big workout a week. This is the foundation.
Level 2 - Breathing & Full Exhale
Restore the zone of apposition (Section 5). Full exhales, 90/90 breathing, balloon drills. Nothing else holds without this.4
Level 3 - Anterior-Core Control
Train the abs to hold the ribs down - dead bugs, hollow holds, reverse crunches, Pallof presses, taken with quality not just quantity.3
Level 4 - Pelvis & Glutes
Fix the tilt from below - glute bridges, hip thrusts, hamstring and hip-flexor work (Section 6).
Level 5 - Posture Integration
Take the stack into standing, sitting and lifting all day (Section 12). This is where it becomes permanent.
Level 6 - Progressive Loading
Once the position holds, load it - heavier core work, weighted carries, full-body strength done with a stacked rib cage.
Self-Assessment
Ten minutes. This tells you how functional vs structural your flare is, and gives you a number to track.
8.1 The exhale test (functional vs structural)
Lie on your back, knees bent. Note the flare. Now exhale slowly and completely, drawing the ribs down. Big reduction = largely functional (this program will move it a lot). Little change = a structural component (still improves, and consider the brace, Section 11). Most people see a clear reduction - that's the encouraging news.
8.2 The pelvis & arch check
Lie down and slide a hand under your lower back. A big gap your hand slides through easily suggests an over-arch / anterior pelvic tilt feeding the flare. Note it; the glute and breathing work will reduce it.
8.3 The breathing check
One hand on chest, one on belly, breathe normally 30s. The belly hand should move more. If the chest dominates and the ribs flare on each breath in, that's the pattern Section 5 fixes.
8.4 Your tracking number
Lie down, relaxed (not exhaling). Lay a ruler across the lower ribs and measure how far the costal margin rises above the breastbone/belly line. Photograph from the side and front in the same light each month. Re-measure every 4 weeks - you want the relaxed flare to shrink as the new position becomes your default.
The Daily Reset Plan
This is the heart of the program. Five to eight minutes, every single day. These drills retrain the position - they matter more than any gym session, because frequency is what re-grooves a posture.
- Setup
- On your back, feet flat on a wall or chair, hips & knees ~90°. Optionally tuck the tailbone slightly so the lower back gently flattens.
- Do
- Exhale slowly and completely through the mouth - feel the front ribs draw down and in. Pause 2–3s at the bottom. Breathe in quietly through the nose without letting the ribs flare back up. 5–8 breaths.
- Do
- In the 90/90 position, exhale into a balloon (or against pursed lips). The resistance makes the abs engage and the ribs drop further. 3–4 breaths.
- Do
- On your back, arms up, knees over hips. Keep the lower back gently pressed down and ribs down as you slowly lower opposite arm & leg, exhaling. Return, switch. 6–10/side. Stop the rep if the ribs pop up.
- Do
- On your back, lower back flat, ribs down. Lift the head/shoulders and legs only as far as you can keep the back flat. Hold 10–20s. Easier: knees bent, arms by sides.
- Do
- On your back, feet flat. Exhale, tuck the pelvis slightly, squeeze the glutes and bridge up without arching the back or flaring the ribs. Hold 2s up. 8–12 reps.
Do this plan daily, including rest days. It's the most important part of the program - more than the gym sessions. Five minutes a day, every day, beats an hour once a week. Position is a habit; build it with reps.
Make Rib Flare Less Obvious
While the breathing and core work changes the flare's position, there's a second lever you can pull at the same time: build the muscle around the costal margin so the flare blends in and stops being the thing the eye lands on. Think of it as camouflage through development.
Here's the visual trick almost nobody tells you: on a lean, undeveloped torso, flared lower ribs stick out against flat skin and grab all the attention. But on a developed midsection, those same ribs read as part of the ab and serratus musculature - the eye interprets the relief as muscle, not deformity. You're not hiding the flare; you're giving it good company so it stops standing alone.
The muscles that do the camouflaging
- Serratus anterior. Those finger-like muscles right above the flare. Well-developed, they create relief that flows into the costal margin, so the ribs look like the bottom of the serratus rather than a flare. The single best "blend-in" muscle.
- Obliques. Build the sides of the waist and the flare stops being the widest, most-forward thing on your lower torso - the obliques frame it and pull the eye outward.
- Rectus abdominis (the abs). A developed, visible six-pack turns the whole lower-rib area into "ab territory." Lean + developed abs make a flare read as anatomy, not flaw.
- Lats. A wider back and the classic V-taper makes the front-on silhouette about width and shape, not the lower ribs. Lats reframe the entire torso.
- Lower chest. A developed lower chest creates a clean shelf above the costal margin, softening the transition so the flare doesn't pop out from under a flat chest.
| Muscle | Best moves | Sets/week |
|---|---|---|
| Serratus anterior | Serratus punch, scapular push-up, dumbbell pullover | 6–9 |
| Obliques | Side plank, suitcase carry, Pallof press, cable woodchop | 6–10 |
| Abs (rectus) | Hanging/reverse crunch, hollow hold, cable crunch | 8–12 |
| Lats | Pull-up, lat pulldown, row, straight-arm pulldown | 10–14 |
| Lower chest | Dip, decline/low-to-high press, deep flye | 6–9 |
All five of these are built straight into the 16-week program below, at the weekly set counts in the table. Obliques and abs come from the core and carry work; serratus is the scapular push-up / dumbbell pullover; and the two pure-camouflage muscles - lats and lower chest - anchor Workout C and show up again in Workout D. You do not have to bolt anything on; just run the program.
This is the look-better layer, and it works - but it works best on a lean torso (low body fat lets the surrounding muscle show and do its framing job). And it complements, never replaces, the breathing and core work that actually changes the flare's position. Do both: fix the position, build the frame, and get lean enough to see it.
The 16-Week Program
The Daily Reset (Section 9) runs every single day - it's the most important part. On top of it, four short strength days a week do two jobs at once: A & B & D build the core, glutes and carries that hold the stack permanently, while Workout C (plus a little spread through the week) trains the five framing muscles from the table above - serratus, obliques, abs, lats and lower chest - so they land in their weekly set targets. You run the same four workouts (A–D) for all 16 weeks; the Progression Map below tells you what to change each week. Ribs down and exhale on every working rep.
Your week at a glance
No matter what, do the Daily Reset Plan (Section 9) - breathing + core resets, ~6 minutes. On training days do it first, as your warm-up. With rib flare, frequency beats intensity: the daily reps re-groove the position, and the gym days make it strong.
| Exercise | Sets × Reps | Notes |
|---|---|---|
| Dead Bug ★ | 3 × 8–10/side | Lower back flat, ribs down.3 |
| Pallof Press | 3 × 10/side | Anti-rotation, ribs down. |
| Hollow Hold | 3 × 15–25s | Anti-extension. |
| Side Plank | 2 × 20–30s/side | Obliques pull lower ribs in. |
| Scapular Push-Up / Serratus Punch | 3 × 10–12 | Serratus wraps the side ribs and keeps them down. |
| Goblet Squat (ribs down) | 3 × 8–12 | Strength in the stack. |
| Exercise | Sets × Reps | Notes |
|---|---|---|
| Hip Thrust ★ | 4 × 8–10 | Squeeze glutes, no back arch. |
| Romanian Deadlift | 3 × 8–10 | Hamstrings & posterior chain. |
| Reverse Crunch | 3 × 12–15 | Curl pelvis up; ribs down. |
| Suitcase Carry | 3 × 30–40m | Anti-tilt under load. |
| Half-Kneeling Hip-Flexor Stretch | 2 × 30s/side | Release the forward pelvis pull. |
| Exercise | Sets × Reps | Notes |
|---|---|---|
| Farmer / Loaded Carry ★ | 4 × 40m | Stack under heavy load. |
| Lat Pulldown / Pull-Up | 4 × 8–12 | Wide lats reframe the waist so the flare reads less. |
| Chest-Supported Row | 3 × 10–12 | Mid-back & lats; ribs stay down. |
| Dumbbell Pullover | 3 × 10–12 | Lats + serratus; big stretch, exhale at the top. |
| Dip / Decline Press | 3 × 8–12 | Lower chest builds a shelf above the flare. |
| Ab Wheel / Weighted Hollow | 3 × 8–12 | Strong anti-extension. |
| Exercise | Sets × Reps | Notes |
|---|---|---|
| 90/90 Wall Breathing | 3 × 6 breaths | Re-set ribs-down before loading. |
| Suitcase Carry ★ | 4 × 40m | Anti-tilt under one-sided load. |
| Hip Thrust | 3 × 10–12 | Glutes; posterior tilt. |
| Pallof Press | 3 × 10/side | Anti-rotation, ribs down. |
| Straight-Arm Pulldown | 3 × 12–15 | Lats again, from a different angle - more width. |
| Dip (lean forward) | 3 × 8–12 | Lower chest fills in below the flare so it sits flatter. |
| Exercise | Sets × Reps | Notes |
|---|---|---|
| Dead Bug ★ | 3 × 8–10/side | Lower back flat, ribs down.3 |
| Band Pallof Press | 3 × 10/side | Anti-extension. |
| Hollow Hold (regressed) | 3 × 15–20s | Anti-extension. |
| Side Plank | 2 × 20–30s/side | Obliques. |
| Scapular Push-Up / Serratus Punch | 3 × 10–12 | Serratus wraps the side ribs and keeps them down. |
| Bodyweight Squat (ribs down) | 3 × 12–15 | Strength in the stack. |
| Exercise | Sets × Reps | Notes |
|---|---|---|
| Single-Leg Glute Bridge ★ | 3 × 10/side | Glutes & posterior tilt. |
| Backpack RDL | 3 × 10–12 | Hamstrings; load a backpack. |
| Reverse Crunch | 3 × 12–15 | Pelvis up, ribs down. |
| Suitcase Carry (jug/backpack) | 3 × 30–40m | Anti-tilt under load. |
| Half-Kneeling Hip-Flexor Stretch | 2 × 30s/side | Release the pelvis. |
| Exercise | Sets × Reps | Notes |
|---|---|---|
| Loaded Backpack Carry ★ | 4 × 40m | Stack under load. |
| Pull-Up / Band Lat Pulldown | 4 × 8–12 | Wide lats reframe the waist so the flare reads less. |
| Inverted Row (table) | 3 × 8–12 | Mid-back & lats; ribs stay down. |
| Backpack Pullover (floor) | 3 × 10–12 | Lats + serratus; big stretch, exhale at the top. |
| Decline / Deficit Push-Up | 3 × 8–12 | Lower chest builds a shelf above the flare. |
| Hollow Rocks | 3 × 20–30s | Strong anti-extension. |
| Exercise | Sets × Reps | Notes |
|---|---|---|
| 90/90 Wall Breathing | 3 × 6 breaths | Re-set ribs-down before loading. |
| Suitcase Carry (jug/backpack) ★ | 4 × 40m | Anti-tilt under one-sided load. |
| Single-Leg Glute Bridge | 3 × 10/side | Glutes; posterior tilt. |
| Band Pallof Press | 3 × 10/side | Anti-rotation, ribs down. |
| Band Straight-Arm Pulldown | 3 × 12–15 | Lats again, from a different angle - more width. |
| Decline / Deficit Push-Up | 3 × 8–12 | Lower chest fills in below the flare so it sits flatter. |
Your 16-Week Progression Map
Same four workouts every week - this table tells you what to change. Rib flare is a control project first, so early weeks are about quality (perfect ribs-down reps), and later weeks add load once the position holds. "RIR" = reps in reserve.
| Week | Phase | Key sets | Reps / hold | Effort | This week's job |
|---|---|---|---|---|---|
| 1 | A · Re-Pattern | 2–3 | 8–10 | 3 RIR | Perfect form; ribs never pop up. |
| 2 | A | 3 | 8–10 | 2–3 RIR | Add reps / a few seconds of hold. |
| 3 | A | 3 | 10 | 2 RIR | Light load on hip thrust/squat. |
| 4 | A | 3 | 10–12 | 2 RIR | More reps; longer holds. |
| 5 | A | 3 | 12 | 2 RIR | Best control of the phase. |
| 6 | B · Strengthen | 3–4 | 8–10 | 2 RIR | +1 set; start loaded carries. |
| 7 | B | 4 | 8–10 | 1–2 RIR | Add weight to hip thrust/RDL. |
| 8 | B | 4 | 8–12 | 1–2 RIR | Add reps / carry distance. |
| 9 | B | 4 | 8–10 | 1–2 RIR | Add weight. |
| 10 | B | 4 | 8–10 | 1 RIR | Heavier carries. |
| 11 | B | 4 | 8 | 1 RIR | Peak of the phase. |
| 12 | C · Permanent | 4 | 6–10 | 0–2 RIR | Heavy glutes & loaded core. |
| 13 | C | 4 | 6–10 | 0–2 RIR | Add weight; keep ribs down. |
| 14 | C | 4–5 | 6–8 | 0–1 RIR | +1 set on key lifts. |
| 15 | C | 4–5 | 6–8 | 0–1 RIR | Peak intensity. |
| 16 | C | 4 | 6–10 | 1–2 RIR | Strong & controlled. |
| 17 | Deload | 2 | 10 | 4 RIR | Easy week - half the sets. Then loop to Week 6 heavier. |
After week 16, the stack should feel automatic. Keep the Daily Reset forever (now a 2-minute habit), and keep training with ribs down as your default. If progress stalls, loop back to Week 6 with heavier numbers.
Where Bracing Fits
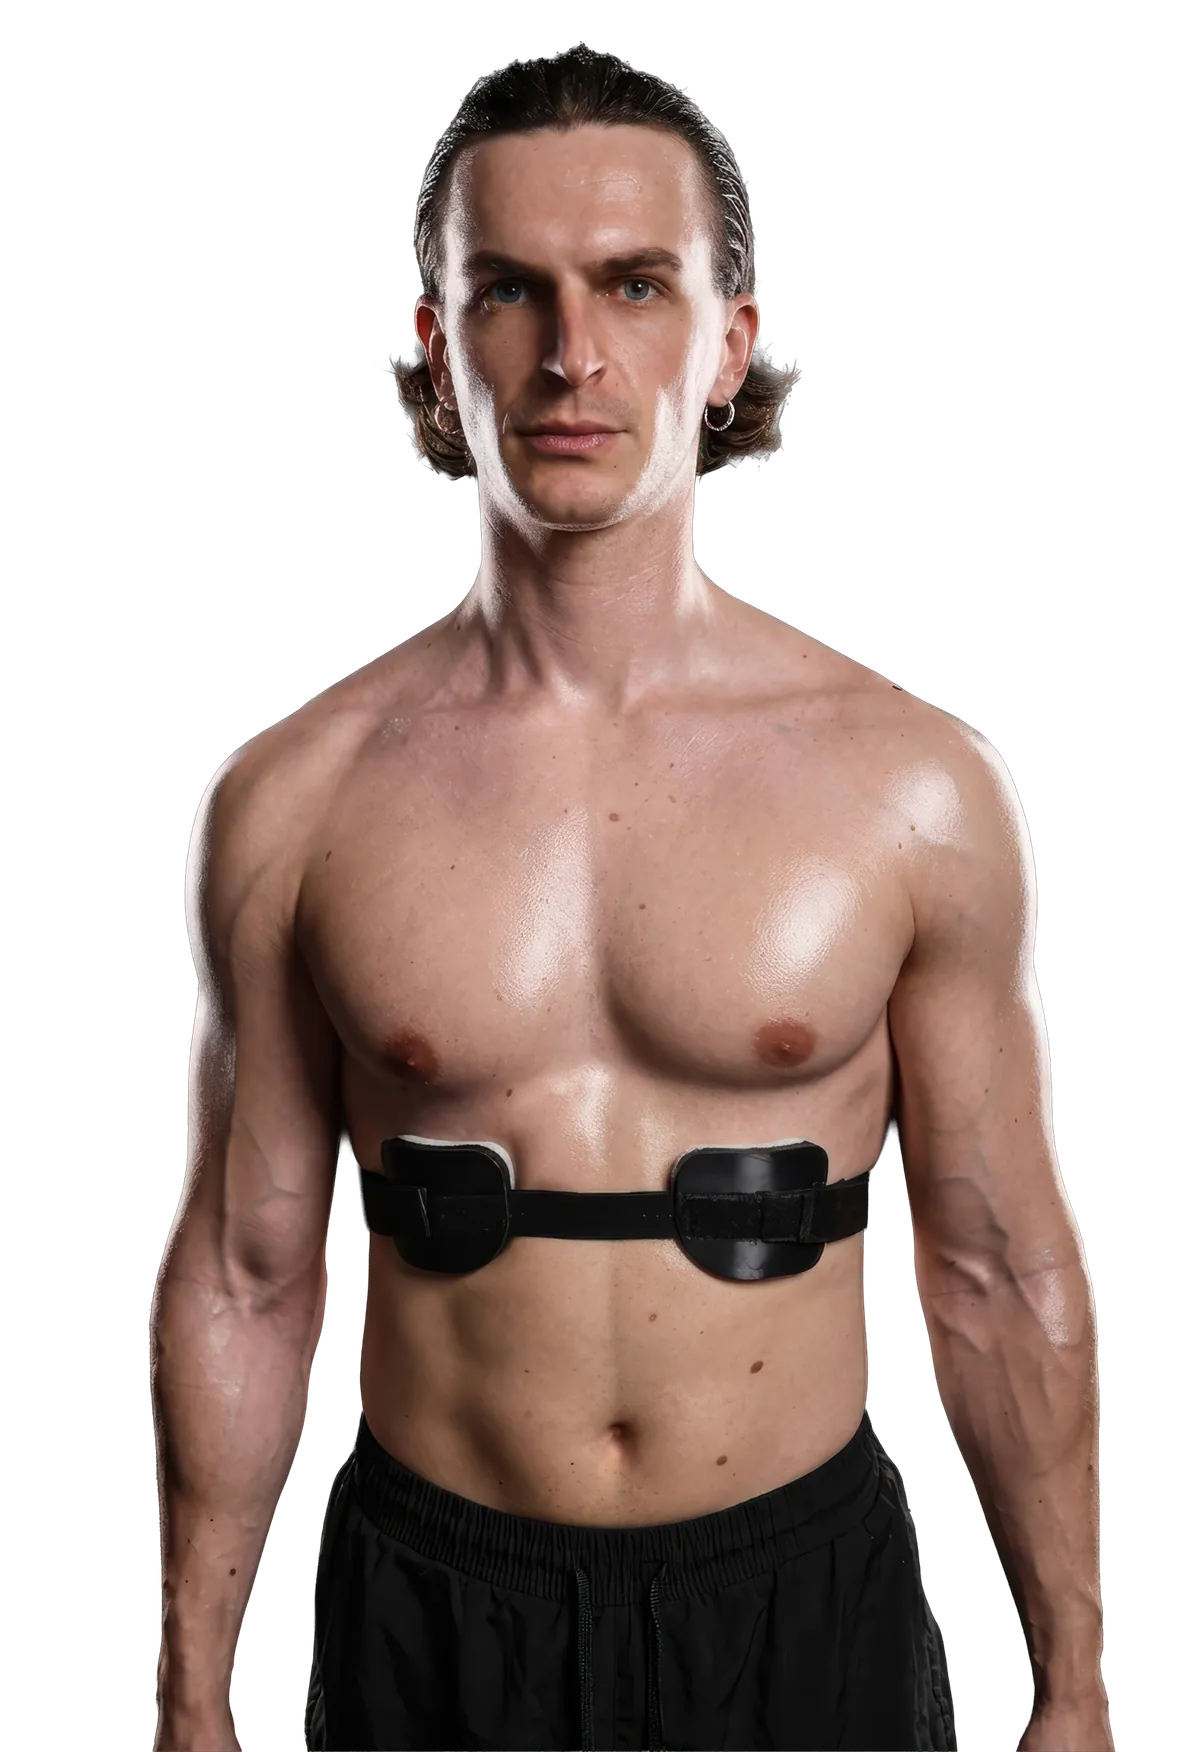
Most rib flare is functional and responds to the training in this program. But if yours has a structural component - the ribs are shaped that way, often alongside pectus excavatum or carinatum - a brace can help with the part exercise can't.
A rib-flare brace applies gentle, directed compression across the flared lower ribs. On a flexible, growing chest, sustained light pressure can gradually encourage the costal margin into a flatter position - the same Wolff's-Law principle that underlies all chest-wall bracing.5 It works best combined with the breathing and core retraining here: the brace gives a positional cue and gentle pressure, while your training builds the muscle and control to hold that position once the brace is off.
Training retrains position, breathing and strength (this program). A brace adds gentle structural pressure for the part that's shaped, not just positioned. Together they cover both. For brace selection, fit and wear schedule, see the dedicated Rib Flare Brace at mrpectus.com.
For purely functional flare, you likely won't need a brace at all - the training does it. For structural flare, a brace helps but rarely "erases" it; the combination of brace + training + a stacked posture is what gives the best, most durable result.
Posture Integration
The drills retrain the position; daily life is where it sticks. You spend far more hours standing, sitting and moving than exercising - so carry the stack into all of it.
The two cues that fix most of it
- Ribs down. Don't puff or lift the chest to "stand tall." Stay tall through the spine while letting the front ribs settle down. A gentle exhale finds it instantly.
- Hips under. A slight tuck of the tailbone (not a forced clench) brings the pelvis under the rib cage so the two stack.
Where to practise the stack
| Situation | Cue |
|---|---|
| Standing in a queue | Exhale, ribs down, hips under - hold easy. |
| Sitting at a desk | Sit tall but ribs down; avoid the arched "chest-up" slump-reversal. |
| Overhead reaching / pressing | Exhale and keep ribs down as the arms go up - the moment flare loves to show. |
| Every gym rep | Brace with ribs down, not ribs flared. |
Daily routine
| When | Do | Time |
|---|---|---|
| Morning | Daily Reset Plan (Section 9) | 5–8 min |
| Throughout day | "Ribs down, hips under" check - a few times an hour | - |
| Training days | Strength program with the stack | ~40 min |
| Before bed | 3–5 full-exhale 90/90 breaths | 2 min |
The people who fix rib flare aren't the ones who train hardest - they're the ones who hold the stack in everyday life. Make "ribs down, hips under" your resting default and the flare fades on its own.
Troubleshooting & What to Expect
Honest timelines and fixes for the things that go wrong - so you don't quit when progress isn't a straight line (it never is).
What to expect, week by week
| When | What you'll likely notice |
|---|---|
| Weeks 1–2 | The flare visibly drops when you exhale and cue the stack - but springs back when you forget. That's normal; you're learning the position. |
| Weeks 3–4 | The stacked position starts holding for longer on its own. Core feels stronger. Friends/photos may already look a little different. |
| Weeks 6–8 | Your resting posture is noticeably more stacked - the flare is milder even when you're not thinking about it. |
| Months 3+ | The new position is becoming your default, and (if you've trained the frame) the surrounding muscle is making it blend. This is the durable result. |
Common mistakes & fixes
| Mistake | The fix |
|---|---|
| Sucking the stomach in to "hide" it | That's a breath-hold, not control. Exhale fully and let the abs draw the ribs down - you should still be able to breathe. |
| Forcing a hard pelvic tuck / clenching glutes all day | Aim for a gentle tuck. Over-tucking just swaps one rigid posture for another. Easy and stackable beats forced. |
| Crunching harder to fix it | Crunches in extension can reinforce the flare. Prioritise anti-extension work (dead bug, hollow, Pallof). |
| Skipping the breathing because it feels too easy | The breathing is the foundation - without the full exhale and ZOA, the core work has nothing to hold onto. Don't skip it. |
| Only training, never carrying it into daily life | Posture is a habit, not a workout. The "ribs down, hips under" cue through the day is where it sticks. |
| Expecting a structural flare to vanish | If yours is structural (Section 1), aim for "much improved + blended," not "gone" - and consider the brace alongside. |
Progress with rib flare is two steps forward, one step back - a stressful week, a lot of sitting, and the old posture creeps in. That's not failure, it's normal. Just return to the daily reset. The people who win are simply the ones who keep coming back to it.
Meditation & Anxiety
Rib flare and chest-wall differences carry a real psychological weight, and managing the anxiety around it is part of the work. People with chest-wall differences report measurably higher anxiety and a more negative body image than their peers.6,7
A daily meditation practice is one of the best-evidenced, lowest-cost tools for that anxiety, supported by randomized trials and large meta-analyses.8,9,10,11,12 It won't change the shape of your ribs; it changes your relationship to the worry about it. Ten minutes a day is enough to start.
I'm no meditation expert, but I practise about 10 minutes every day, and it's made a big, big difference to how I carry all of this. The app I love is Waking Up by Sam Harris, it's the easiest way I've found to actually start and stick with it. If money's tight, use its scholarship: at sign-up you can set the price to $0 and try it completely free.
How to start, 10 minutes a day
- Guided first. Don't sit in silence wondering if you're doing it right, follow a guided session. Waking Up is what I use; choose the scholarship / $0 option to try it free.
- Same time daily. 10 minutes, ideally in the morning before you reach for your phone. Consistency beats length.
- Notice, don't fight. When a thought about your ribs shows up, label it and return to the breath. That's the whole rep, and it pairs naturally with the ribs-down breathing you're already practising.
Chest-wall patients carry a documented anxiety and body-image burden,6,7 and mindfulness meditation has solid evidence for reducing anxiety.8,10 Ten minutes a day is a real, free tool, so it earns its place beside the training.
FAQ
How long until my rib flare improves? +
Will sit-ups and crunches fix it? +
Is rib flare always a problem? +
Can I still lift weights normally? +
Do I need a brace? +
I also have pectus excavatum or carinatum - does this still apply? +
References
Rib flare lacks dedicated trials, so this program rests on chest-wall clinical literature, respiratory and core biomechanics, and resistance-training science. Sources are listed honestly below.
- The pectus care guidelines: best-practice consensus guidelines from the joint specialists. [mrpectus research library, PMID 38964837] - Chest-wall classification and management consensus; context for rib flare with pectus.
- Flaring of the ribs associated with other skeletal anomalies. [mrpectus research library, PMID 14365170] - Rib flare can be structural and travel with other chest-wall/skeletal patterns.
- Schoenfeld BJ. The mechanisms of muscle hypertrophy and their application to resistance training. J Strength Cond Res. 2010;24(10):2857–2872. - Mechanical tension drives core strength/growth; basis for the anti-extension core work.
- Illi SK, Held U, Frank I, Spengler CM. Effect of respiratory muscle training on exercise performance in healthy individuals: a systematic review and meta-analysis. Sports Med. 2012;42(8):707–724. - Respiratory-muscle training improves breathing-muscle function; supports the breathing work.
- Wolff J. Das Gesetz der Transformation der Knochen (The Law of Bone Remodeling). Berlin: Hirschwald; 1892. - Bone/cartilage adapts to mechanical load; the principle behind bracing for structural flare.
- Body-image, self-concept and mental exposure in patients with anterior chest-wall deformity. mrpectus research library, PMID 21290134. - Measurable impact on body image and self-concept.
- Chest-wall deformity patients suffer from lower quality of life and impaired body image. mrpectus research library, PMID 21440452. - Lower QoL and more negative body image vs peers.
- Goyal M, et al. Meditation programs for psychological stress and well-being: a systematic review and meta-analysis. JAMA Intern Med. 2014;174(3):357–368; PMID 24395196. - Mindfulness meditation programs reduce anxiety.
- Hofmann SG, et al. The effect of mindfulness-based therapy on anxiety and depression: a meta-analytic review. J Consult Clin Psychol. 2010;78(2):169–183; PMID 20350028. - Robust anxiety reduction across studies.
- Hoge EA, et al. Randomized controlled trial of mindfulness meditation for generalized anxiety disorder. J Clin Psychiatry. 2013;74(8):786–792; PMID 23541163. - RCT evidence in clinical anxiety.
- Kabat-Zinn J, et al. Effectiveness of a meditation-based stress reduction program in the treatment of anxiety disorders. Am J Psychiatry. 1992;149(7):936–943; PMID 1609875. - Early MBSR anxiety trial.
- Khoury B, et al. Mindfulness-based therapy: a comprehensive meta-analysis. Clin Psychol Rev. 2013;33(6):763–771; PMID 23796855. - Large meta-analysis supporting mindfulness for anxiety.
There are no large randomized trials specific to rib-flare exercise correction. This program is built on the biomechanics of the rib cage and core, established breathing science, and resistance-training evidence, plus chest-wall clinical consensus - and it reflects what reliably works in practice. Where a claim is mechanism-based rather than trial-proven, the text says so. Functional flare is highly responsive; structural flare improves partially and may benefit from a brace.
© mrpectus · The Rib Flare Program v1.0 · Mihail Veleski · For education, not medical advice.